
PowerPhotos Help
Exporting photos from a library
In addition to copying photos between libraries, PowerPhotos also lets you export copies of your photos from a library to a folder on your hard drive.
Starting an export
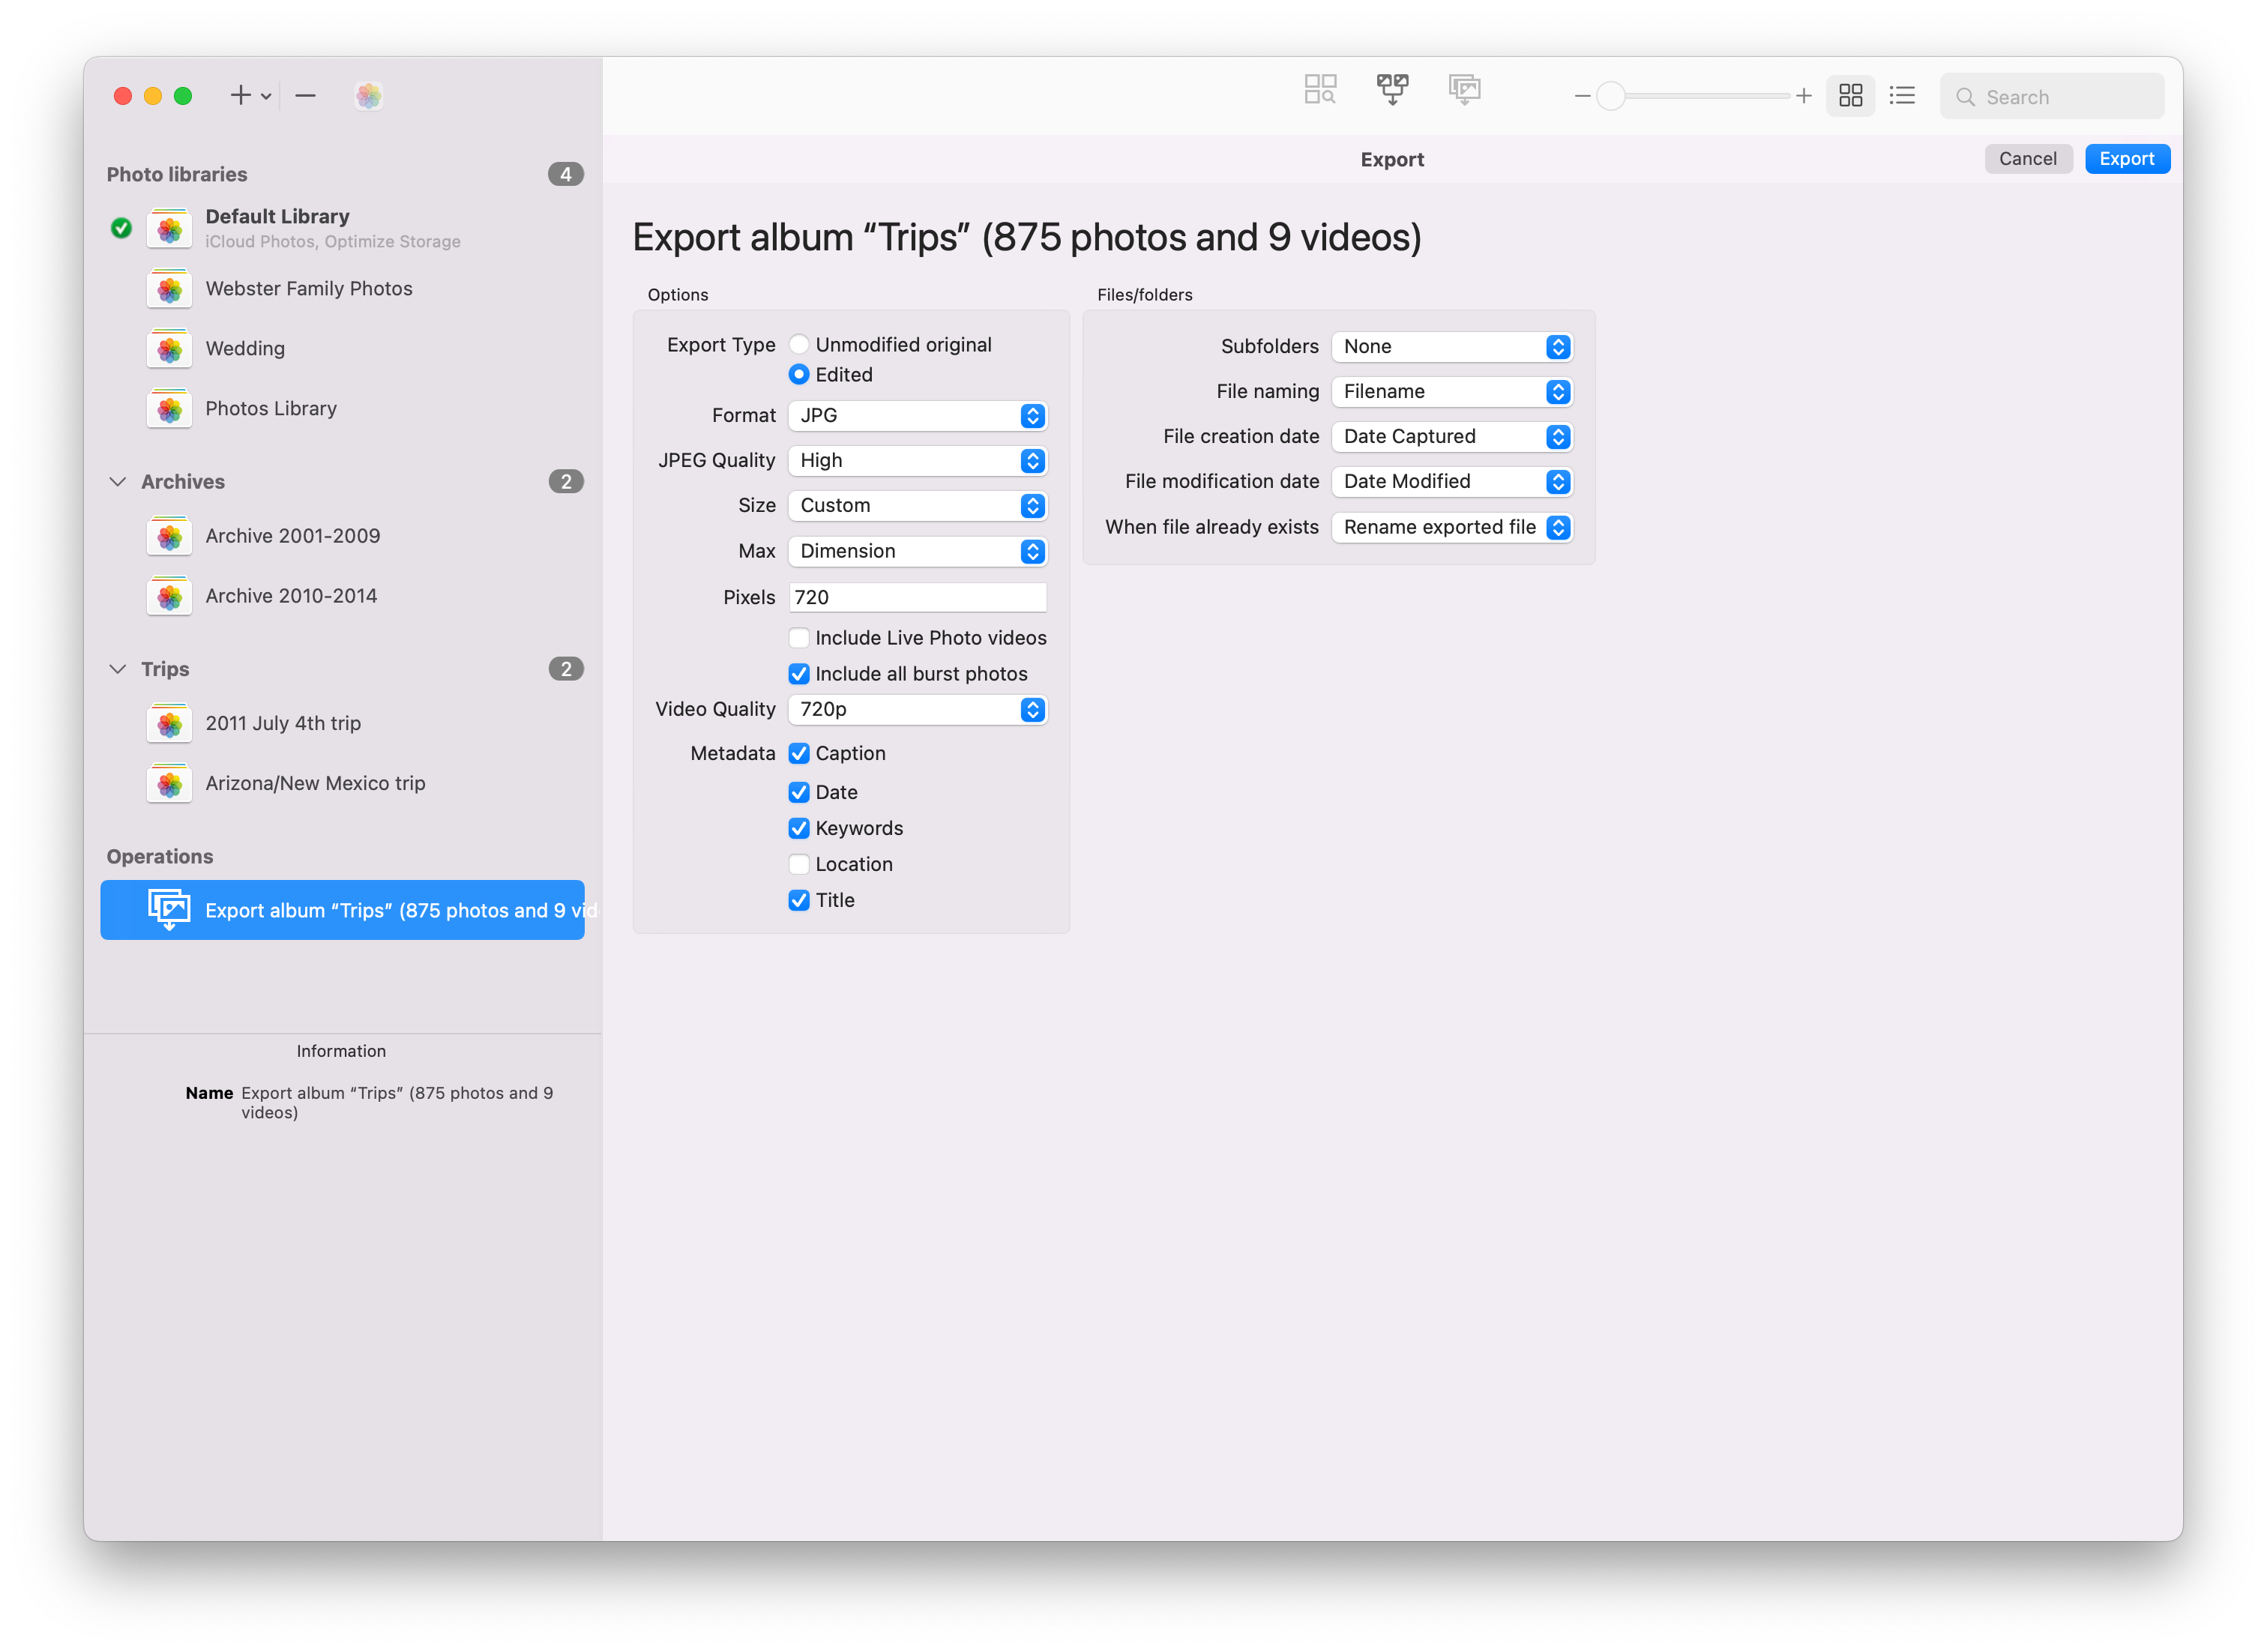
To start an export, select the albums or photos you want to export, then select “Export” from the File menu. PowerPhotos will then display a number of options for your export. After you’ve configured the export, click the “Export” button in the upper right to perform the export.
Original vs. edited
When exporting, you can opt to either export the current version of the photo, including any edits that have been made in Photos, or you can export the unedited photo that was originally imported into the library. If you’re exporting unedited originals, none of the other options to modify the exported photos will be available. Note that animated GIFs will always be exported as original since converting them to a format that only shows a single still photo doesn’t make sense.
Format & quality
PowerPhotos supports exporting photos as JPG, HEIF, PNG, or TIFF. The JPG and HEIF formats use lossy compression, and allow you to select what quality of compression you’d like to use. Higher quality will make the photo look better, but result in a larger file size, whereas lower quality will take less disk space, but the photo may lose some of its finer details.
Size
By default each photo will be exported at its current size, but you can also tell PowerPhotos to scale down the photos to a custom size. Enter a number of pixels to scale to, then choose to have PowerPhotos scale the photo to either have its height or width match that pixel count. Choosing the “Dimension” option will tell PowerPhotos to scale whichever side of each photo is largest to that pixel count. PowerPhotos will never scale an image to be larger than its current size. If a photo is already smaller than the size you specify, it will be exported without being resized.
Include Live Photo videos
When exporting Live Photos, PowerPhotos can export both the photo and video components of each Live Photo. If selected, a .mov file will be exported alongside the photo with the same filename as the photo (e.g. exporting “IMG_1234.JPG” will also export a “IMG_1234.MOV” file). If you later import the photo/video pair back into a Photos library, Photos will recombine the two parts to show them as an individual Live Photo. Only JPG and HEIC support Live Photos though, so videos will not be included when exporting as PNG or TIFF.
Video quality
PowerPhotos can export videos as well as photos. When exporting videos, you can choose a size and type of compression to use. The default choice is exporting as H.264 video at 720p. You can choose a different size, or you can also choose to export using the newer HEVC codec, which results in smaller file sizes, but may not be playable on older devices.
Metadata
PowerPhotos can include metadata that you’ve assigned to your photos embedded in the EXIF metadata of each exported photo. This includes dates, keywords, titles, captions, and GPS locations. If any of these options is unchecked, PowerPhotos will not add the metadata to the exported photo’s EXIF data, but if the original photo had any of this metadata, it may still be present in the exported photo. The exception to this is location data, which can be privacy concern. If the Location box is unchecked, then PowerPhotos will make sure to strip all location data from the exported photo.
Files/folders
If you are exporting albums, PowerPhotos can either export the photos into a single flat folder, or it can create a hierarchy of folders that mirrors the album hierarchy you’ve built in your library.
You can also choose what filenames PowerPhotos uses for the exported photos. The options are:
- Filename: Uses the original filename of the photo when it was first imported into the library.
- Title: If you have given custom titles to your photos, PowerPhotos will use that title as the filename. For photos without a title, PowerPhotos will fall back to using the filename instead.
- Sequential: PowerPhotos will name each photo with the same prefix, and an incrementing number appended to the end. For example, if you specify the prefix “image_”, then the exported files will be named “image_001.jpg”, “image_002.jpg”, and so forth.
If the file naming option you choose results in more than one photo having the same filename (e.g. if the “Filename” option is selected, and you export two different photos named “IMG_0001.JPG” to the same folder), then PowerPhotos will automatically append a number to the end of the additional copies of the photo to avoid filename collisions (e.g. “IMG_0001 2.JPG”)
File creation/modification date
By default, the files created by PowerPhotos will have a creation date shown in the Finder of when the export was performed. If you select the “Photo date” option instead, then PowerPhotos will assign the date the photo was taken (including any adjustments you’ve made to the photo’s date using Photos) as the file’s creation date instead. A similar setting is provided for setting the Finder modification date as well.
When file already exists When exporting to an existing folder, if there are files already present in that folder, then it’s possible that PowerPhotos will need to export a file to a location where a file already exists. In this case, you have three options:
- Replace existing file: the existing file will be overwritten by the newly exported one
- Keep existing file: PowerPhotos will skip exporting the photo, and keep the existing file in place instead
- Rename exported file: PowerPhotos will choose a new name for the exported file by appending a number to the end of the filename, so that both the existing file and exported file will be in the folder side by side.