
Performing actions on duplicate photos
Once your duplicate rule has decided which photos are keepers, you can specify one or more actions that you'd like to perform on the photos in the duplicate group. Actions include things like flagging, hiding, or trashing the photo, adding a "duplicate" keyword to it, or adding the photo to an album. You can specify one type of action to be taken on the keeper photos, and another action to be taken on the nonkeeper photos.
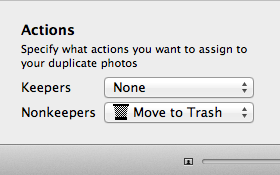
The most common configuration will be to move nonkeepers to the trash, and take no action on the keepers, but you can customize this to take different actions on both kinds of photos. Selecting a new action from one of the pop-up menus at the bottom of the window will update the duplicate browser to show what action will be taken on each photo. You can also control-click on a photo to manually assign an action.
The available action types are:
Move to Trash: moves the photo to iPhoto’s trash. The photo will not immediately be deleted from the library, so this action can be undone if necessary. To do so, open the library in iPhoto, and select the “Trash” item in the album list on the left. That will show you all the photos that are currently in the trash in that library. To move photos out of the trash, either drag them over to the main “Photos” album, or select them and then choose “Put Back” from the Photos menu at the top of the screen (this must be done in iPhoto itself, not in iPhoto Library Manager).
Flag: marks the photo as flagged, so it will appear with an orange flag icon in its corner when browsing in iPhoto. You can also see all your flagged photos by selecting the “Flagged” album in the album list.
Hide: marks the photo as hidden in iPhoto. This makes it so that the photo no longer appears when scrolling through your photos in iPhoto. You can reveal hidden photos by choosing “Hidden Photos” from the View menu in iPhoto. Hidden photos will be displayed, but with an orange “X” displayed in the corner of the photo. To unhide a photo, select it and choose “Unhide Photo” from the Photos menu.
Add to Album: this will add the photo to an album named “Duplicates” in the iPhoto library. If an album named “Duplicates” already exists, the photos will be added to that album, otherwise iPhoto Library Manager will create a new “Duplicates” album and then add the photos to it.
Assign Keyword: adds a keyword named “duplicate” to the photo. This will allow you to see which photos are marked as duplicates by looking at their keywords, use the search field in iPhoto to find photos marked with the “duplicate” keyword, or set up a smart album that shows photos marked with that keyword.
No changes will actually be made to your library until you click the “Apply” button in iPhoto Library Manager while browsing your duplicate photos. This allows you to experiment with different rules and actions and see the results before committing to actually making any changes to the library.