
Merging libraries
PowerPhotos allows you to merge the contents of multiple libraries together into one, while preserving all your albums, moments, and photo metadata. To begin a merge, click the “Merge Libraries” toolbar button, or select “Merge Libraries” from the Library menu. This will present you with the following view for setting up your merge:
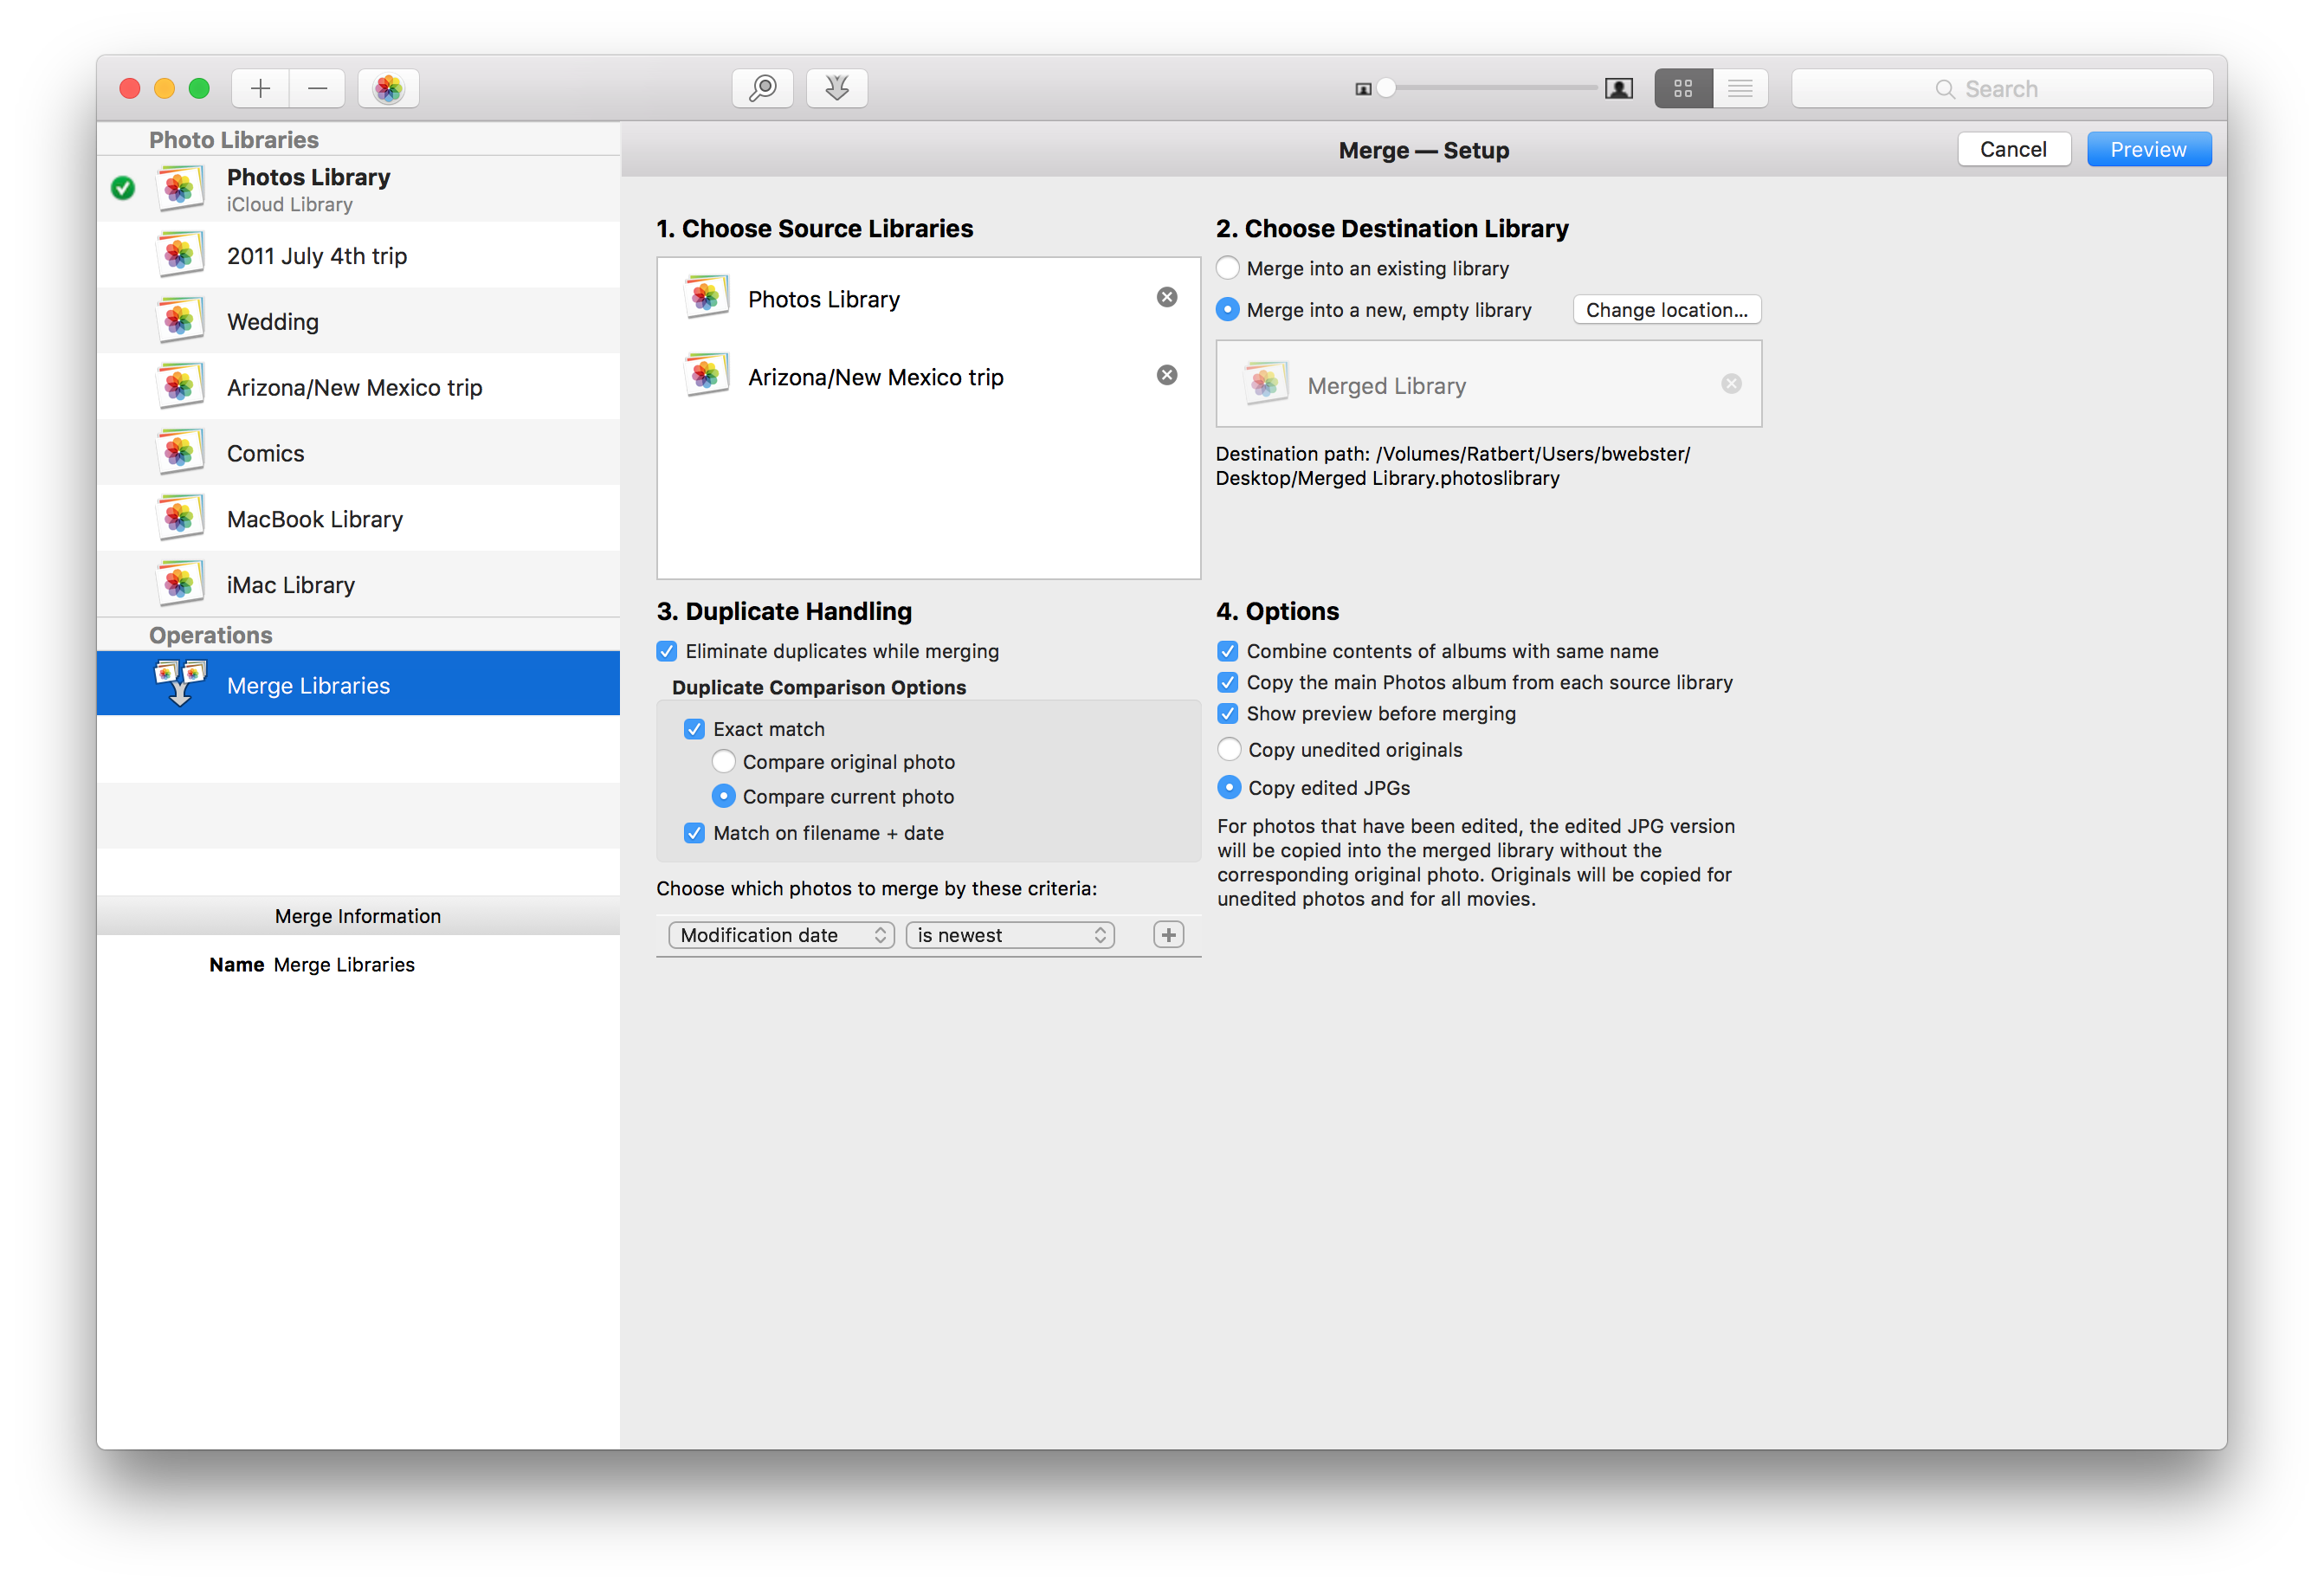
There are four main parts to setting up your merge
-
Choose Source Libraries To specify one or more libraries whose contents you would like to merge into another library, drag the libraries from the library list on the left and drop them onto the area labelled “Choose Source Libraries”.
-
Choose Destination Library Then, you must specify what Photos library you want to receive all the photos and other content you’re merging. You can either drag one of your existing libraries to where it says “Drop destination library here”, or if you wish to start a brand new library instead, click the “Merge into a new, empty library” button. You will then be prompted to choose a name and location on your hard drive to store the new library. If you wish to change this location later, click the “Change location” button to do so.
-
Duplicate Handling When merging libraries, PowerPhotos provides an option to only import a single copy of any duplicate photos that occur multiple times among the libraries being merged together. If the “Eliminate duplicates while merging” checkbox is off, then all photos will be imported, regardless of whether they are duplicates. You’ll almost always want to leave this option enabled.
-
The “Duplicate comparison options” gives you control over how PowerPhotos looks for duplicates in the libraries being merged. You can find details on how these work in the “Starting A Duplicate Search“ chapter of the manual.
-
The “Choose which photos to merge by these criteria“ allows you to specify how PowerPhotos should decide which photo from a group of duplicate photos should be included in the merged library. You can read more about how these criteria work in the duplicate rules chapter of the manual.
-
Note that unlike when using Find Duplicates, the merge process never deletes any duplicate photos. PowerPhotos is simply using the rules to choose a single photo to import from each group of duplicate photos. You can read more about how this works in the Handling Duplicates When Copying section of the manual.
-
When merging into an existing Photos library, if a group of duplicate photos contains one photo that is already in the destination library, that photo will always be the one to be kept rather than a photo from any of the source libraries being merged. The reason for this is because there is not a reliable way to replace an existing photo with a different one in Photos, including making sure that photo appears in the correct place in albums, projects, and other various aspects of the library structure. The best way around this limitation is to merge into a new library rather than an existing library.
-
-
Options
-
Combine contents of albums with same name. This option determines what to do if an album with a particular name is present in more than one library that’s being merged. For example, say you’re merging two libraries that both have an album named “Vacation”. If this option is checked, then a single “Vacation” album will be created in the merged library, with the combined contents of the two original “Vacation” albums. If unchecked, then each “Vacation” album will be copied separately, resulting in two albums in the merged library.
-
Copy the main Photos album from each source library. Each Photos library has a special “Photos” album at the top of the album list which shows every photo in the library. If this option is enabled, then PowerPhotos will create an additional album in the merged library that contains all the photos from the source library. So for example, if you’re merging two libraries named “2009” and “2010”, then your merged library will have two new albums named “Photos (from 2009)” and “Photos (from 2010)”, with each album containing all the photos from the 2009 and 2010 libraries, respectively.
-
Show Preview. By default, PowerPhotos will show you a preview of what the merged library will look like before it starts the actual merging process. You can disable this preview if you want PowerPhotos to automatically proceed to performing the merge without needing to approve it manually.
-
Copy unedited original, Copy edited JPGs, or Copy both images. Specifies whether to copy the current, edited version of each photo to the merged library, or the unedited original version. On macOS 10.15 or later, you can also select to copy both images with reversible edits intact. See the “Copying limitations” help page for more details on how this works.
-
Backing up your library. If you choose to merge into an existing library rather than a new one, you’ll be prompted with the option to make a backup copy of the destination library before proceeding with the merge. This is a convenience in case you end up wanting to revert back to the library in its pre-merge state.
-
Once you have set up your merge, click the “Preview” button to advance to the preview screen, where you can see what the results of your merge will look like.